Quickstart
Skeet connects your AI tools to your favorite apps, making them work together seamlessly.
Your Skeet MCP key is a secret key, giving access to your connected apps. Never share it with anyone. You can easily rotate the key at any time in the dashboard.
Add your MCP key to your AI app
The first step is to add your Skeet MCP key to your preferred AI application. This key allows your AI to access the Skeet Model Context Protocol server.
Cursor Setup
To configure MCP Servers in Cursor, you need to modify the global MCP servers mcp.json file.
- Open Cursor Settings
- Select MCP
- Select "Add new global MCP Server"
- In the
mcp.jsonfile, you need to specify a list of MCP servers. Use the following JSON structure:
{
  "mcpServers": {
    "skeetbuild": {
      "url": "https://skeet.sh/ot/YOUR_SKEET_MCP_KEY"
    }
  }
}
Treat your MCP configuration like a password. Never share it or commit it to version control.
- Save the mcp.json file
- Make sure server is set to Enabled in the settings UI.
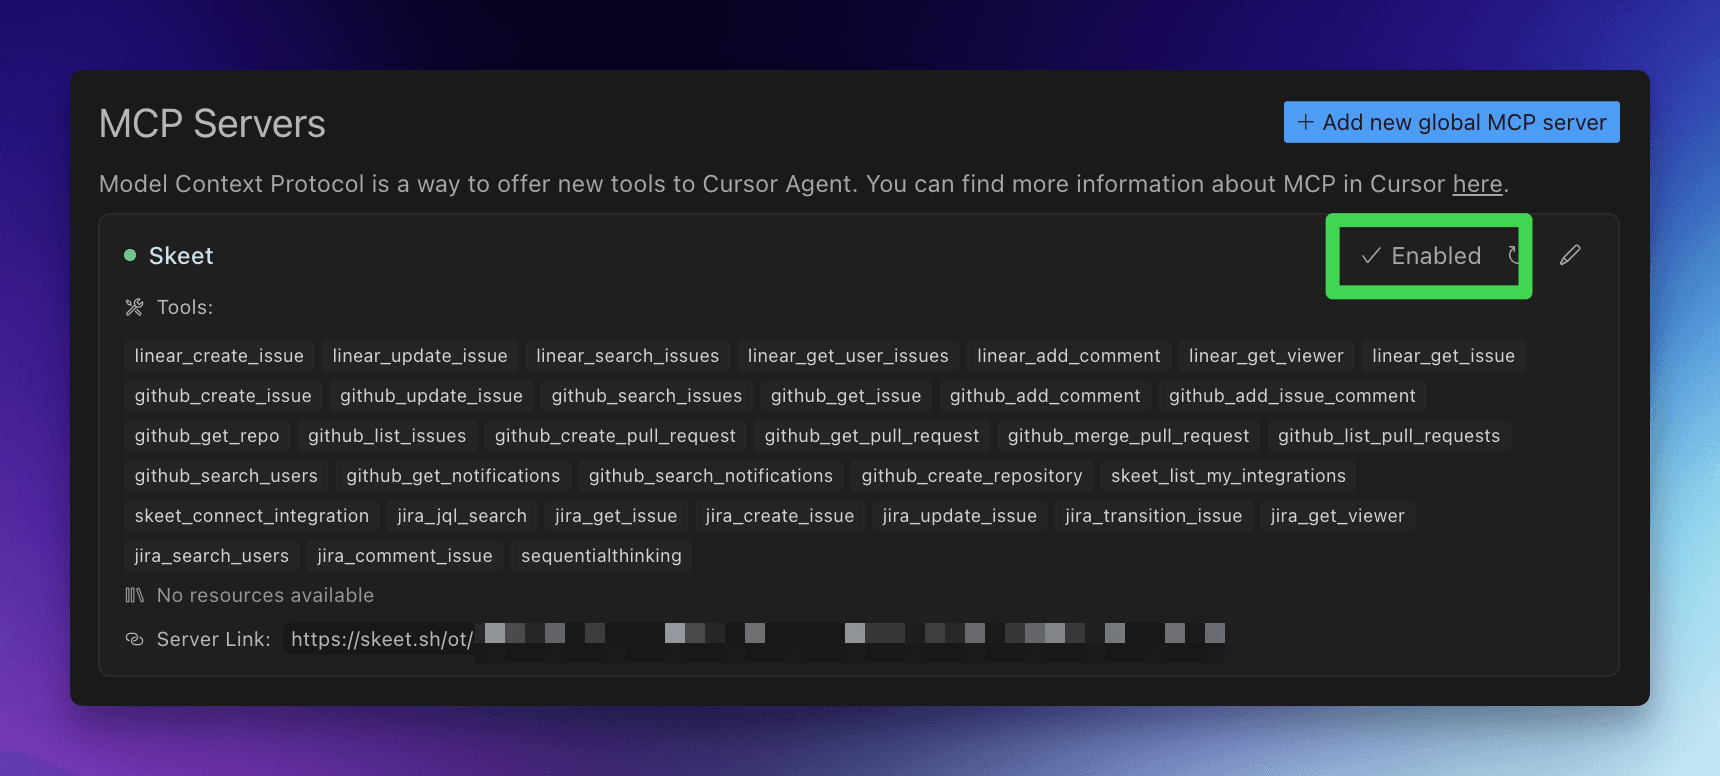
If you want to use a different MCP server per project, you can create a new mcp.json file in the project root under .cursor/mcp.json
To learn more about Cursor's MCP implementation, visit the Cursor MCP documentation.
Windsurf Setup
To configure MCP Servers in Windsurf, you need to modify the ~/.codeium/windsurf/mcp_config.json file.
- Open Windsurf
- Open Cascade by using
⌘L - To quickly access the MCP config file, find the toolbar above the Cascade input and click the hammer icon (🔨), then click the "Configure" button
- In the
mcp_config.jsonfile, you need to specify a list of MCP servers. Use the following JSON structure:
{
  "mcpServers": {
    "skeetbuild": {
      "command": "npx",
      "args": [
        "-y",
        "@skeetbuild/gateway",
        "--sse",
        "https://skeet.sh/ot/YOUR_SKEET_MCP_KEY"
      ]
    }
  }
}
Treat your MCP configuration like a password. Never share it or commit it to version control.
- Save the
mcp_config.jsonfile - If the integration is successful, the toolbar should indicate that you have MCP servers available, and you should see "1 available MCP server" (or more if you configured additional servers).
Claude Setup
To get started, you need to add your Skeet MCP Server Key to Claude.
- Open Claude Desktop
- Click Claude from the menu bar
- Click on the "Settings" tab
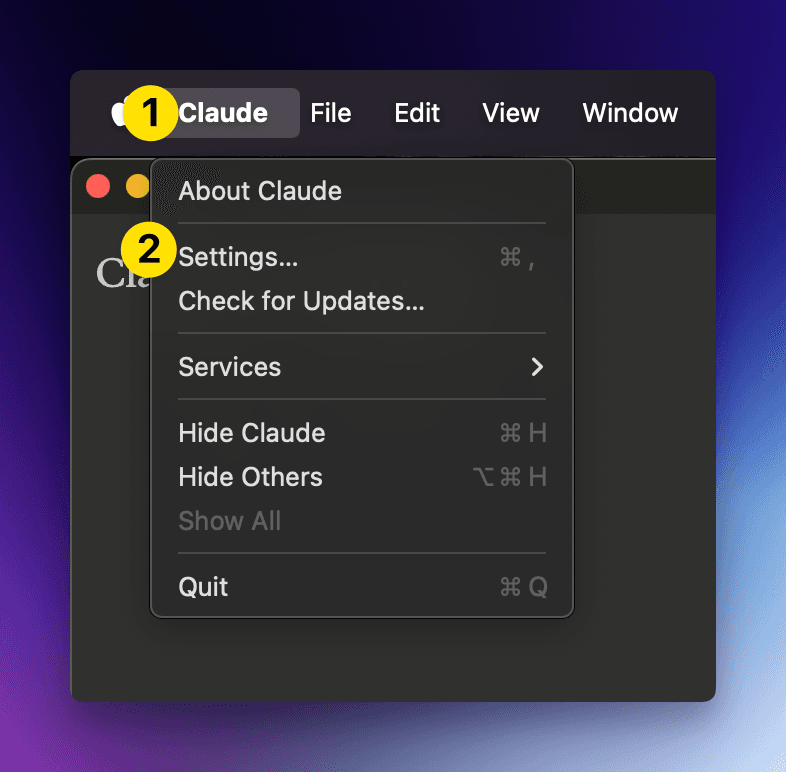
- Click on the "Developer" tab
- Click "Edit Config"
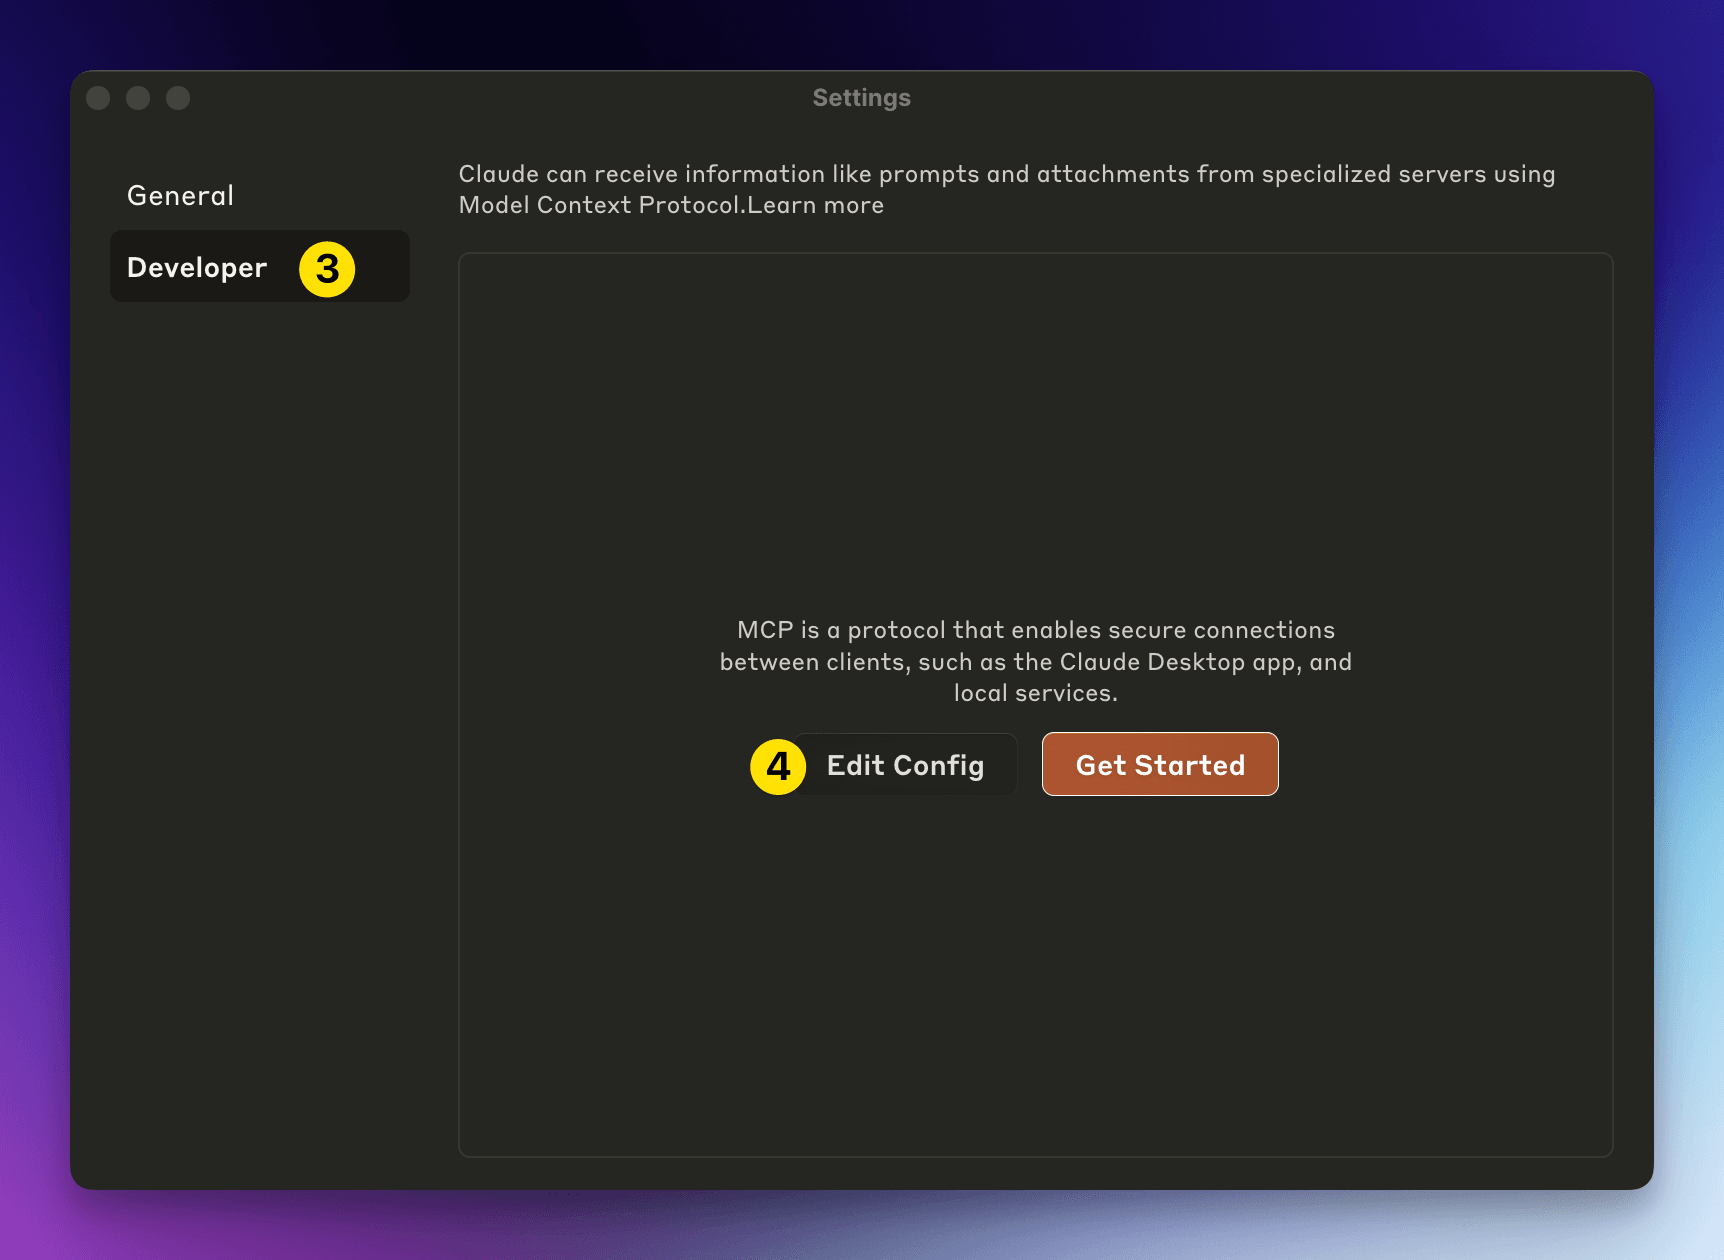
- Add the following code to your
claude_desktop_config.jsonfile:
{
  "mcpServers": {
    "skeetbuild": {
      "command": "npx",
      "args": [
        "-y",
        "@skeetbuild/gateway",
        "--sse",
        "https://skeet.sh/ot/YOUR_SKEET_MCP_KEY"
      ]
    }
  }
}- Restart Claude Desktop to apply the changes. You should see the hammer icon with the number of tools connected.
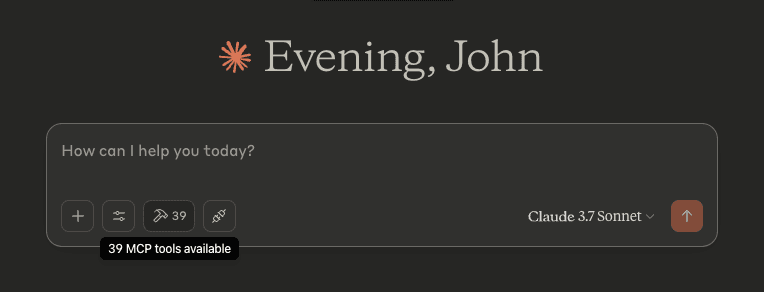
You should now be able to see the tools in the tools menu.
Verify your MCP connection
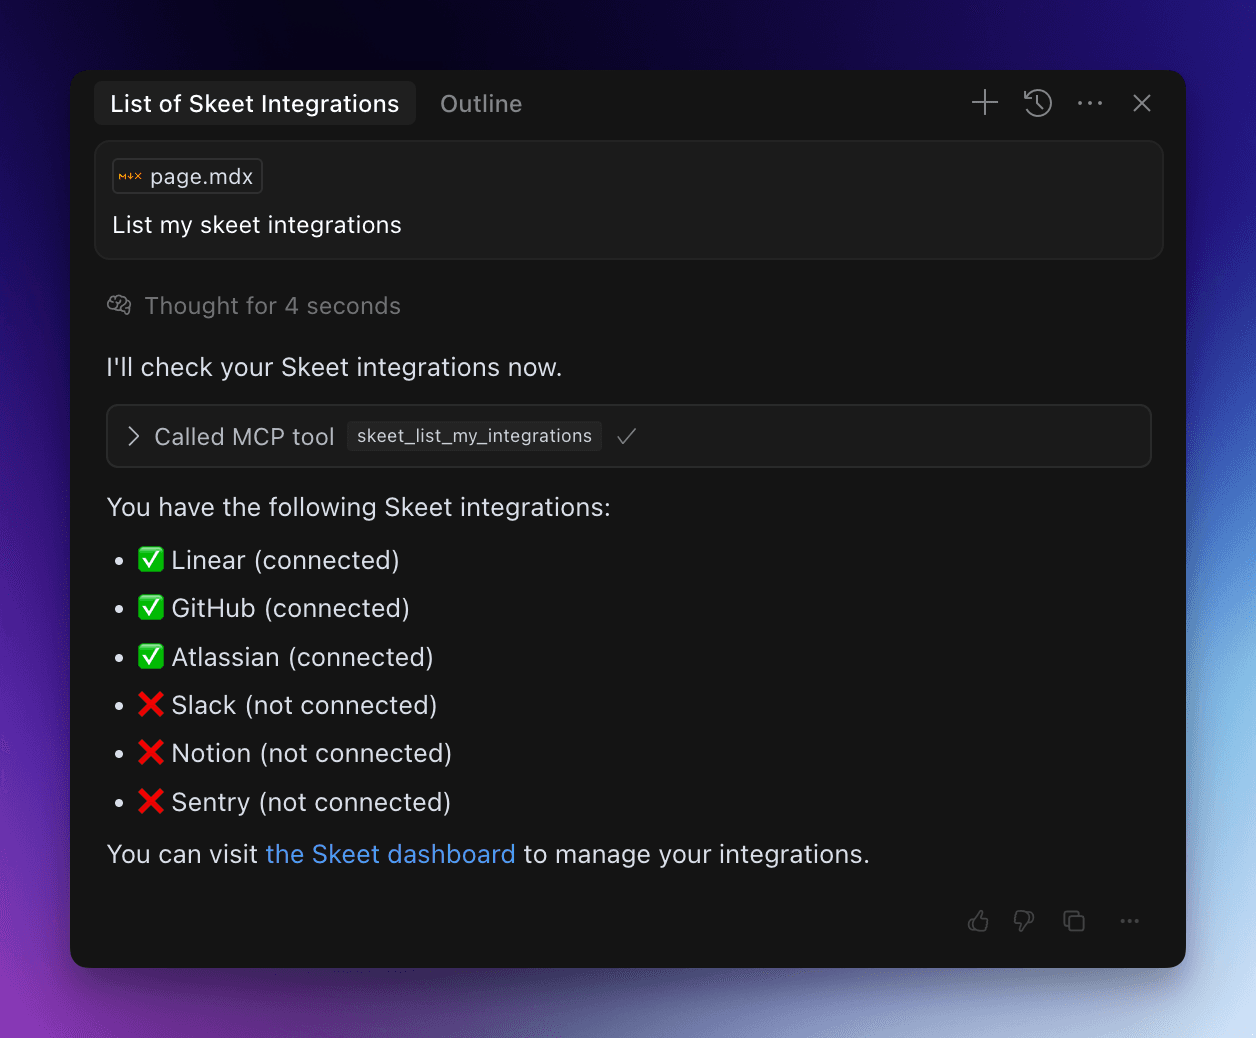
After adding your MCP key, you can verify the connection is working by listing your available integrations. This command lets you check that your AI can successfully communicate with the Skeet MCP server.
List my skeet integrations
Your AI should respond with a list of available integrations and their connection status. If everything is working correctly, you'll see a welcome message from the Skeet MCP server.
Connect Integrations
Now that your AI is connected to Skeet, you can connect to your favorite apps through OAuth. This allows your AI to access and work with data from these applications.
Connect integrations in the dashboard ».
The more tools you connect, the more powerful your AI will be.
Integrations
Sequential Thinking
Enable dynamic and reflective problem-solving through structured thinking steps.
Make your first MCP query
After connecting an integration, you can start making queries using the MCP tools. Here are some examples of how to interact with your connected integrations:
Find my open pull requests on GitHub
Your AI will use the appropriate MCP tool to interact with the connected application and perform the requested action.
What's next?
Great! You've now set up Skeet MCP, connected an integration, and made your first query. Explore the available integrations and make your AI even more powerful.